

Let us build something real #
Reading about a tool and using it are different sports. So instead of describing BYOB in the abstract, we build together: a personal task manager. Simple enough to finish quickly, complex enough to show how the workflow actually feels.
By the end you hold a working app on a live URL. Not a mockup, not a prototype. Software anyone with a browser can open.
Step 1: getting started with your first prompt #
The blank page is the hardest part. Good news: you do not need to specify every pixel upfront. You need enough for the model to give you something to react to.
Open the BYOB dashboard, start a new project, name it "My Task Manager." You land in the editor with three panels: code, chat, and preview. In the chat panel, type:
"Create a personal task management dashboard. I want a clean, minimalist design with a dark mode toggle. It should have three columns: 'To Do', 'In Progress', and 'Done', allowing me to move cards between them."
Notice the shape: purpose (task management), aesthetic (clean, minimalist, dark mode), structure (three-column Kanban). No mention of CSS or frameworks. You speak like a person briefing a skilled developer.
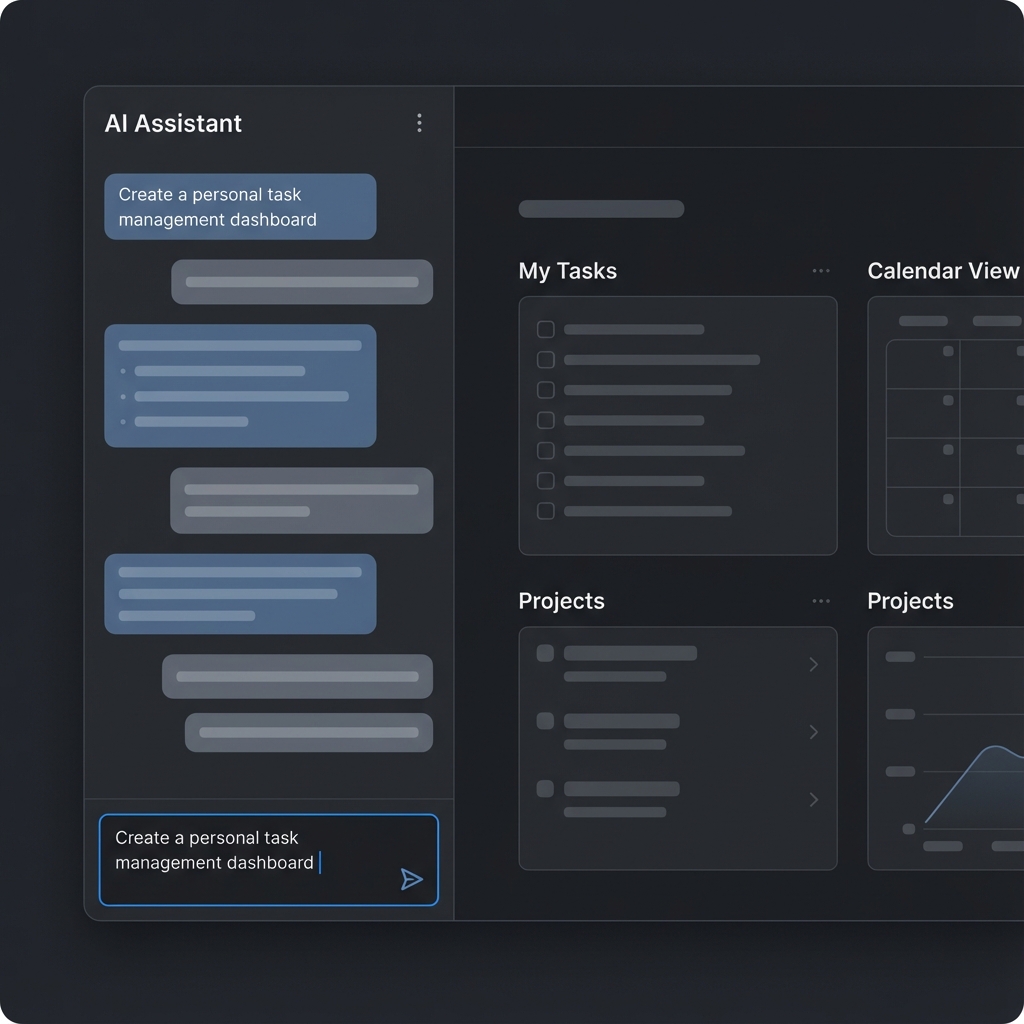
Hit enter and watch the preview panel. Quickly, a Kanban board appears: columns, cards, layout. Imperfect, but surprisingly close to the picture in your head. That gap between imagined and generated is where the rest of this tutorial lives.
Try it: AI website prompt builder
Step 2: understanding what just happened #
Pause and appreciate the output. The model did more than emit HTML. It created an organized project structure, a responsive three-column layout, working drag-and-drop between columns, the requested dark mode toggle, and consistent styling throughout.
A human developer spends hours on this, including fiddly bits like smooth drag behavior. The model does it fast because it has seen thousands of working implementations and knows the patterns that hold.
What sits underneath matters more than it seems. BYOB generates SvelteKit applications. SvelteKit is a framework for building robust, performant web apps with Svelte, handling routing, server-side rendering, data fetching, and production builds (https://svelte.dev/docs/kit/introduction). The official tutorial introduces it as the layer that solves the tricky production problems: routing, SSR, data fetching, prerendering, builds, deployment (https://svelte.dev/tutorial/kit/introducing-sveltekit). Your Kanban board is not a toy runtime. It stands on the same foundation teams use for production software.
Development speed has a concrete source too. SvelteKit builds on Vite, whose dev server serves native ES modules with extremely fast hot module replacement (https://vite.dev/guide/). That is why the preview updates feel instant: the toolchain was designed for the exact loop you are in, describe, see, adjust.
But keep expectations honest. The first output is a first draft. Good enough to confirm direction, almost certainly needing refinement. That is fine, because refinement is fast.
Step 3: refining the design #
Something tangible beats something imagined. Now make it better, one change at a time.
Say the columns look identical and you want distinction. Type:
"Make the 'To Do' column header blue, 'In Progress' yellow, and 'Done' green. Add a subtle shadow to the task cards so they pop off the background."
Seconds later the preview updates. Colored headers, cards with depth. No CSS file hunting, no class name archaeology, no box-shadow syntax lookups. Description in, pixels out.
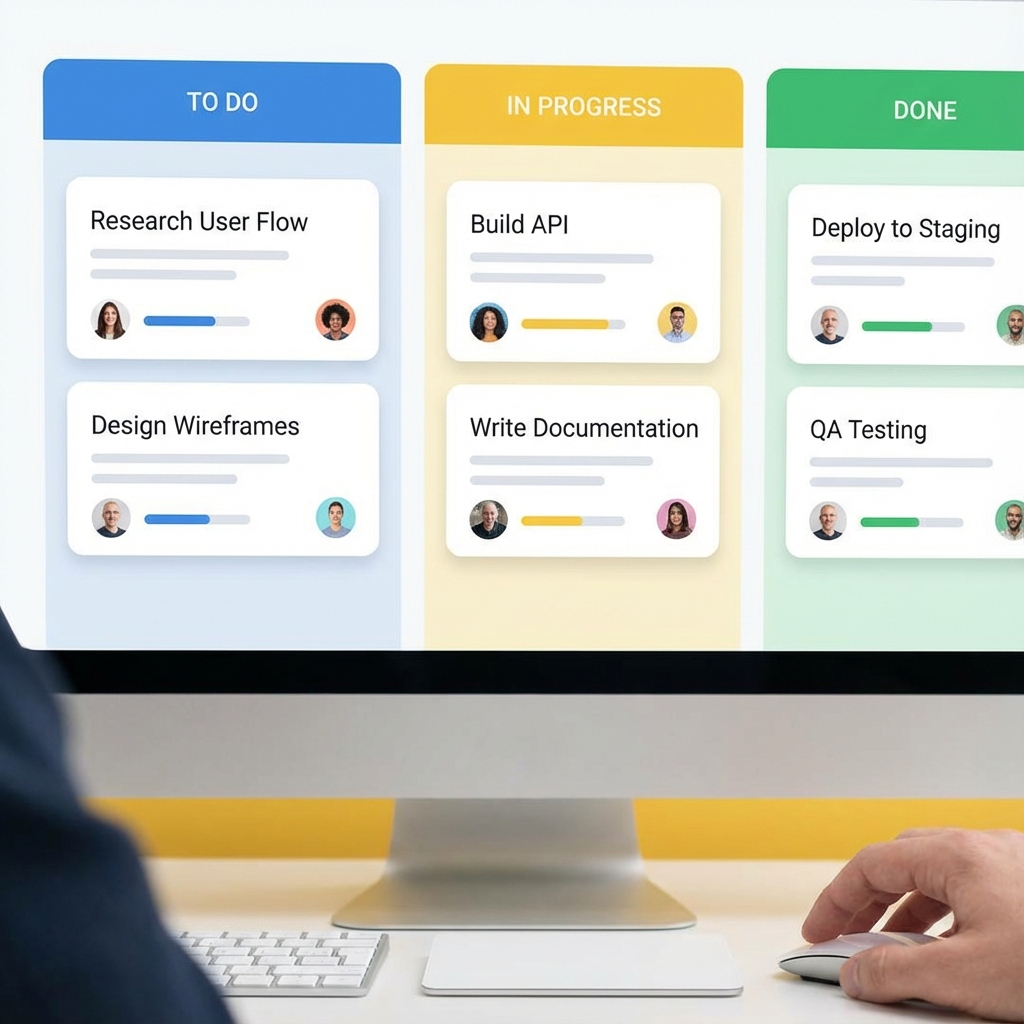
This loop is the whole craft: prompt, see, refine. Each round costs seconds instead of minutes. Ten design directions fit in the time one used to take. The people who get most from AI builders are not better prompters. They are faster iterators.
What do you learn from reading the code it wrote? #
Sooner or later curiosity wins and you open the code panel. Good. The generated code is yours to read, and reading it teaches the framework faster than any tutorial because every line exists to serve your app.
A task card component reads close to plain language:
<script>
    let { task, onMove } = $props();
    const overdue = new Date(task.due) < new Date() && !task.done;
</script>

<article class="card" class:overdue>
    <h3>{task.title}</h3>
    <p>Due {task.due}</p>
    <button onclick={() => onMove(task.id)}>Move forward</button>
</article>

<style>
    .card { padding: 1rem; border-radius: 0.75rem; box-shadow: 0 2px 8px rgb(0 0 0 / 0.12); }
    .overdue { border: 2px solid #e5484d; }
</style>
Props flow in, markup describes the card, style stays scoped to the component. SvelteKit adds the app shell around pieces like this: routes map URLs to pages, load functions fetch data for them, and form actions handle submissions with progressive enhancement so things work before JavaScript arrives. You do not need to memorize this on day one. Just notice the shape each time you peek. Familiarity compounds quietly.
When something in the preview looks wrong, read the code before reprompting. Half the time you spot a wrong class or a missing prop in seconds. The other half, you return to chat with a sharper description because you saw what the model actually built. Either way the peek paid for itself.
Step 4: adding real functionality #
A task manager without due dates has a short useful life. Add them:
"I need to know when tasks are due. Add a date picker to the task creation form and display the due date on the card. If a task is overdue, give its card a red border."
Now you ask for more: form changes, data handling, conditional styling. The model wires it all: picker in the form, dates on cards, red borders on overdue items. You never compare date objects by hand or evaluate picker libraries. Behavior described, implementation delivered.
At this point a useful habit forms. Ask for one behavior per prompt. Date picker first, then overdue styling, then sorting by date. Compound requests produce compound confusion. Single requests produce clean diffs you can actually review.
What do you do when the preview fights back? #
Sooner or later a prompt produces something baffling. The date picker appears but saves nothing. The red border shows on every card including ones due next year. Do not panic and do not rewrite everything. Debug like you would with a junior developer: isolate, describe, verify.
First, state what you see versus what you expected in one sentence each. "Every card has a red border. Only overdue cards should." That sentence is already a better prompt than "fix the dates." Second, ask for the smallest change that could explain it. "Check how overdue is calculated and fix the comparison." Third, test the exact case that failed before moving on. Add a task due tomorrow and confirm its border stays neutral.
Three failure shapes cover most cases. Stale state means the preview shows yesterday logic; refresh and retest before blaming the code. Vague scope means your prompt allowed two readings and the model picked the wrong one; add the missing constraint. Compound edits mean one prompt changed three things and one of them broke; split and redo. Name the shape, apply the fix, keep moving. Debugging AI output is still debugging. The tools changed, the discipline did not.
How do you make tasks survive refresh? #
Browser memory forgets. Close the tab and the tasks vanish, which is fine for a demo and fatal for a tool. Persistence comes in two tiers.
Tier one is browser storage. Ask BYOB to save tasks to local storage and they survive refreshes on the same device. Zero backend, zero latency, zero cost. Perfect while you validate the design.
Tier two is a real database. When tasks must follow the user across devices and sessions, connect storage like Cloudflare D1: create the database with one command, bind it to the project, and query it through server code with safely bound parameters (https://developers.cloudflare.com/d1/get-started/). The prompt stays plain: "Store tasks in the database so they persist across sessions and devices." The generated server route does the SQL you never had to learn.
Start with tier one. Graduate when the app earns it.
Step 6: deploying to the real internet #
The preview runs on your machine, for your eyes. Deployment puts it on the internet for everyone.
The traditional path eats afternoons: hosting provider, server config, DNS, SSL certificate, build pipeline. BYOB compresses it to one button: Deploy.
Behind the scenes the project compiles into an optimized production build. Images compress, JavaScript and CSS minify, assets push to a global content delivery network, and an SSL certificate provisions automatically. Shortly after, a URL like task-app-xyz.byob.site answers from anywhere in the world.
Preview and production differ on purpose. Preview optimizes for your iteration speed. Production optimizes for everyone else load time. Vite production builds target widely available browser baselines and emit highly optimized static assets for exactly this reason (https://vite.dev/guide/). Same code, different packaging, different job.
Your task manager is now live. You built it in minutes, on infrastructure you never configured.
The whole tutorial compresses to this map. Each row is one loop of prompt, preview, and judgment.
| Step | What happens | What it teaches |
|---|---|---|
| First prompt | Task manager appears with layout and dark mode | Enough detail beats total detail |
| Refine | Column colors and card shadows | One change at a time |
| Read the code | Task card component in plain Svelte | Generated code is yours to learn from |
| Add dates | Date picker plus overdue borders | Ask for behavior, not code |
| Debug | Isolate, describe, verify | Treat the model like a junior dev |
| Persist | Browser storage, then a real data layer | Match storage to the need |
| Deploy | One button to a live URL | Ship early, extend after |
What are the trade-offs? #
Learning by building in BYOB is fast because the loop is short. Speed teaches some things well and hides others.
| Where this path wins | Where it loses |
|---|---|
| Idea to live URL in one sitting, on a real SvelteKit foundation (https://svelte.dev/docs/kit/introduction) with Vite fast refresh underneath (https://vite.dev/guide/) | Generated code can feel understood before it is. Routing, load functions, and form behavior stay fuzzy until you read the files |
| Small refine loops make iteration cheap, so ten directions cost what one used to | Persistence and auth decisions still need deliberate thought. Browser storage first, then D1 (https://developers.cloudflare.com/d1/get-started/) when data must sync |
| Every line exists to serve your app, which makes reading the code a better lesson than a generic tutorial (https://svelte.dev/tutorial/kit/introducing-sveltekit) | Debugging without framework basics turns superstitious: reprompting instead of reading |
Pick the alternative, a manual SvelteKit tutorial, when the goal is learning the framework itself rather than shipping today. If the goal is a working app plus familiarity that compounds, build here and peek at the code often.
What we learned building this #
The three panel editor in this post matches the workspace in the app, with code, chat, and preview side by side. The debug loop of isolate, describe, and verify works because every change renders in the preview before it ships. Persistence and auth follow the same ladder the post climbs. Browser storage first, then a real data layer through Supabase or D1 when the app earns it.
Who this is for (and who should skip it) #
This tutorial fits first timers who learn by building rather than reading docs. If you want a live URL today and understanding tomorrow, follow it in order.
Skip it if you already ship with BYOB daily. The chat and deploy chapters repeat what you know, though the debugging loop is worth a skim.
One limit to know. First builds often break in small ways that only make sense if you read the preview errors slowly. A common mistake is stacking new prompts on top of a broken state instead of fixing one issue and rechecking the preview.
- Best for beginners building a first live app from a single prompt.
- Best for non-technical founders learning deploy and fix loops.
- Best for small business owners testing an idea as a working page.
Where should you go from here? #
What you built is genuine functional software, not a wireframe. And it is only the start.
Want accounts so each person sees private tasks?
"Add user authentication. When someone visits, they should be able to sign up or log in, and each user should only see their own tasks."
Want AI assistance inside the app?
"Add a button that uses AI to break a big task into smaller sub-tasks automatically."
Want sharing, search, tags, reminders? Each one is a conversation, not a project. The constraint moved. Time stopped being the limit. Taste and judgment took its place, which is a much more interesting problem to have.